Follow the 8 steps below which are shown using images and please also read the notes if present above each image for clear picture.
STEP 1 :

STEP 2 :
Notes : Please Enter a Valid Email Address and fill in all other details correctly
Once u have Entered all the details click create account.
Your Account will be created.

STEP 3 :

STEP 4 :

STEP 5 :
Notes : Enter desired domain name and click on Check availability

STEP 6 :
Notes : i entered my domain name as sadir3, which was available and my domain name is now registered as sadir3.co.cc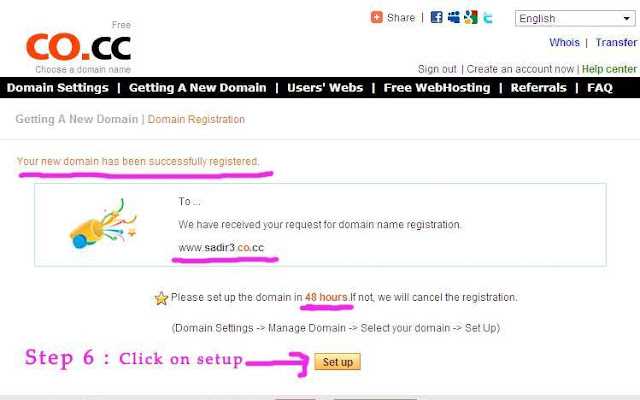

STEP 7 : 

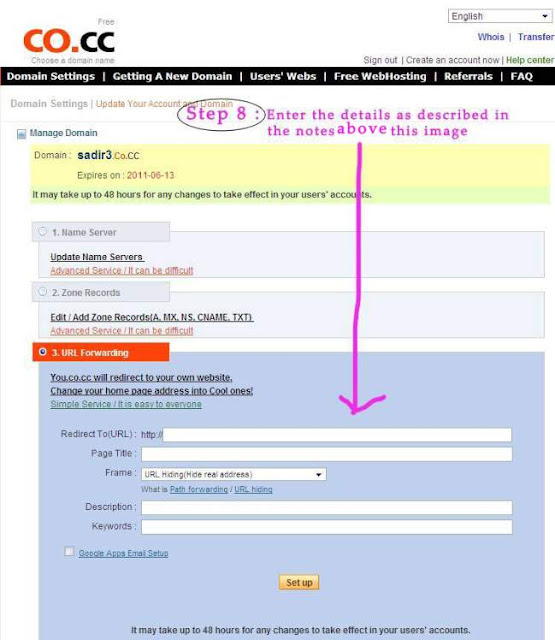
STEP 8 :
Notes : There are 4 options we will consider the first 3 options
- Name Server : This is difficult to deal with for a newbie, and has a lots of details to cover so i will write a new post on how to set up a name server.
- Zone Records : Like Name Server This is difficult to deal with for a newbie, and has a lots of details to cover so i will write a new post on how to set up a name server.
- URL Forwarding : This is the simplest of all and its really very very easy to deal with.
a) in the first field Redirect to (URL) http:// : enter your blogs name or any free domain name or a registered domain name. for example you can enter your blogs name if u have a blog on blogger which is www.xxxx.blogspot.com ( where xxxx is your blog name) or if u have a wordpress blog then u can enter your wordpress blog name www.xxxx.wordpress.com ( where xxxx is your blog name ) .
b) next in the page title field enter your blogs page title.
c) next you'll see the description field it really doesn't matter what u enter in the description field so just enter anything valid or invalid about your website.
d) next you'll see the keywords field it really doesn't matter what u enter in the keywords field so just enter anything valid or invalid about your website.
e) Next Click on Setup
f) Thats it you are done... after 10 mins open a browser type the address of your new Co.CC domain name
( in my case sadir3.co.cc ) and press enter.... BANG.... your blog or your domain name is now running on your new Co.CC custom domain name.

2 comments:
Great pоѕt. I am dеaling with somе of these іssues ass well..
Feel free to visit my web-site; oslo fylkeskommune ledіge stillingеr og 7021 (icanbeastar.com)
Forever Calender in C++